Windows 2012, Windows 2012 R2
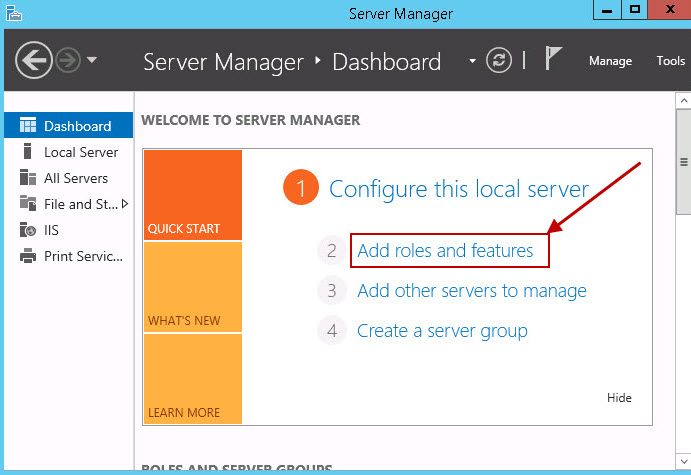
- Open Server Manager
- Click on Add roles and features on Dashboard page
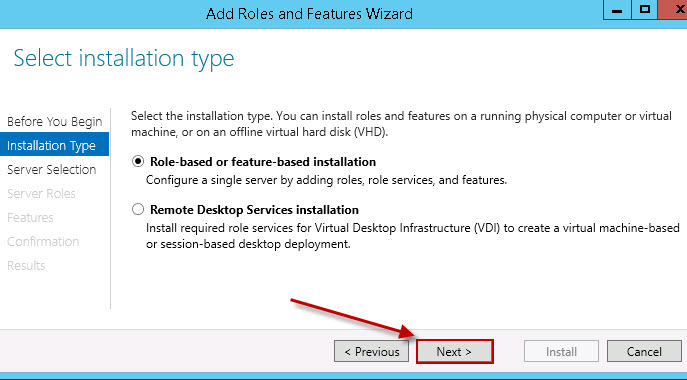
- Next the wizard prompts you to verify the prerequisites have been met, click next

- In next window Select Role-based or feature-based installation, and then click Next
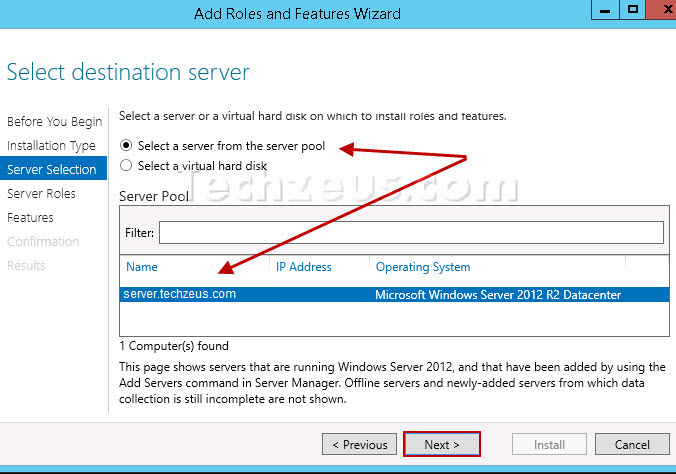
- Next check Select a server from the server pool, choose the server (the default is local server) and then click next
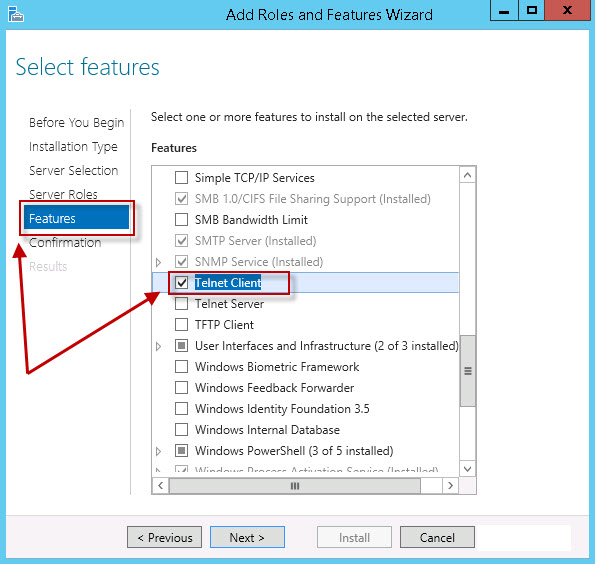
- Next click on Features on the navigation pane and check Telnet Client under Features (scroll through the list to locate Telnet Client)
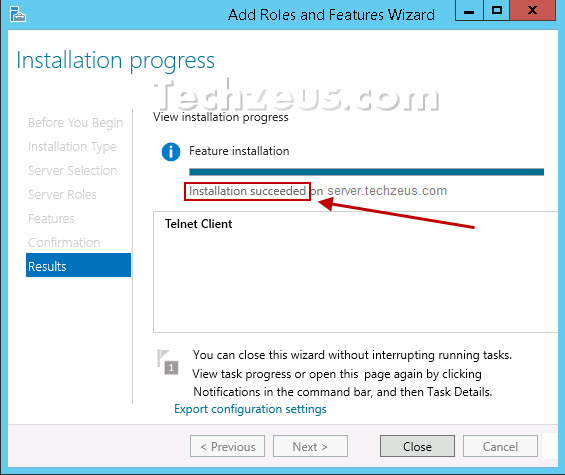
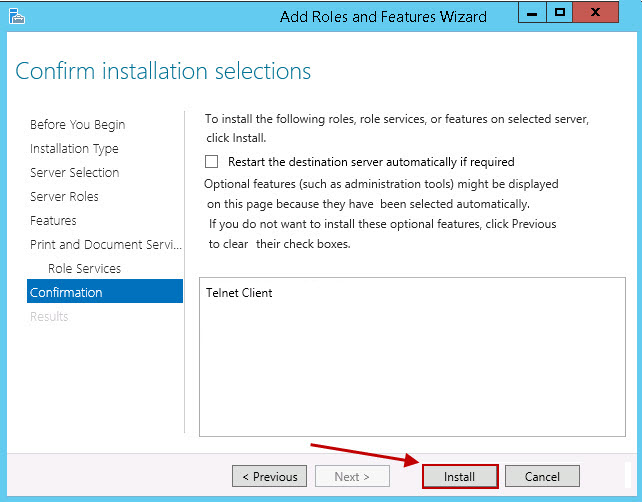
- Next review the selected option and click install to start the installation process
- Restart the server to complete the installation